What is EDIDA?
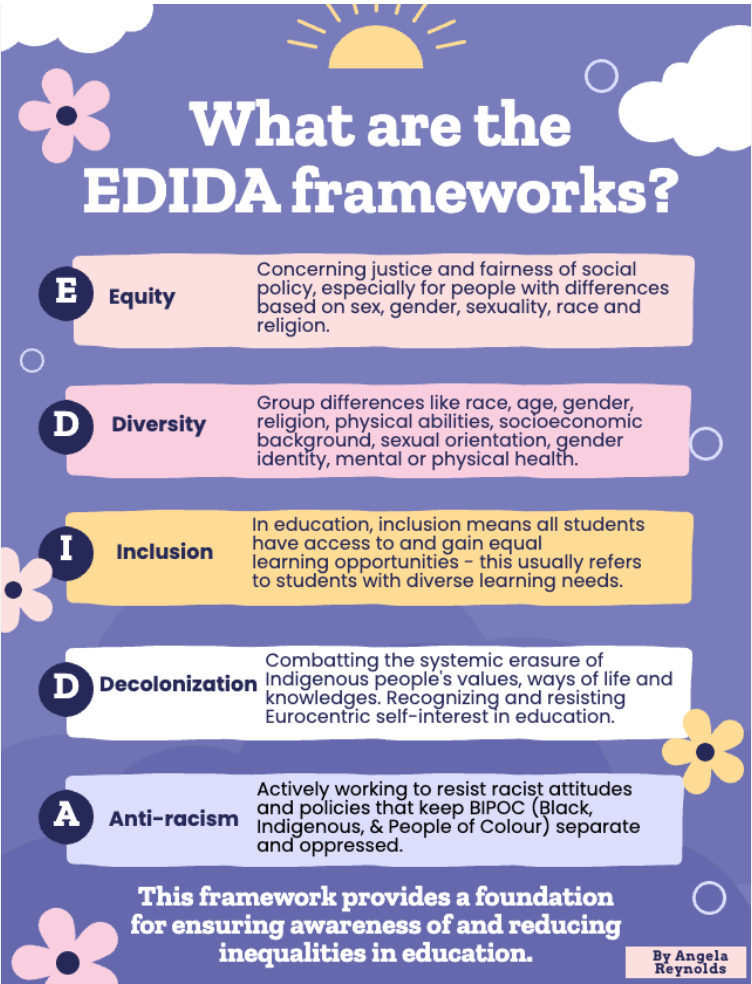
To me, the EDIDA Framework is fostered around knowing the truth of our history to know why things are the way they are today. We all come into teaching with biases, often unconscious that have been shaped within us for years. It is my job as an educator to do my best to discover these and once I am aware, check in and find ways to avoid them to become a more culturally responsive teacher. This is a huge step toward fostering the EDIDA framework to make schools the most welcoming, inclusive, and safe places for all students, specifically marginalized students to learn. In the artifact I created, I chose to focus mostly on Inclusion by making a family tree where all students can see themselves as part of the classroom community.
Inspiration for my Artifact
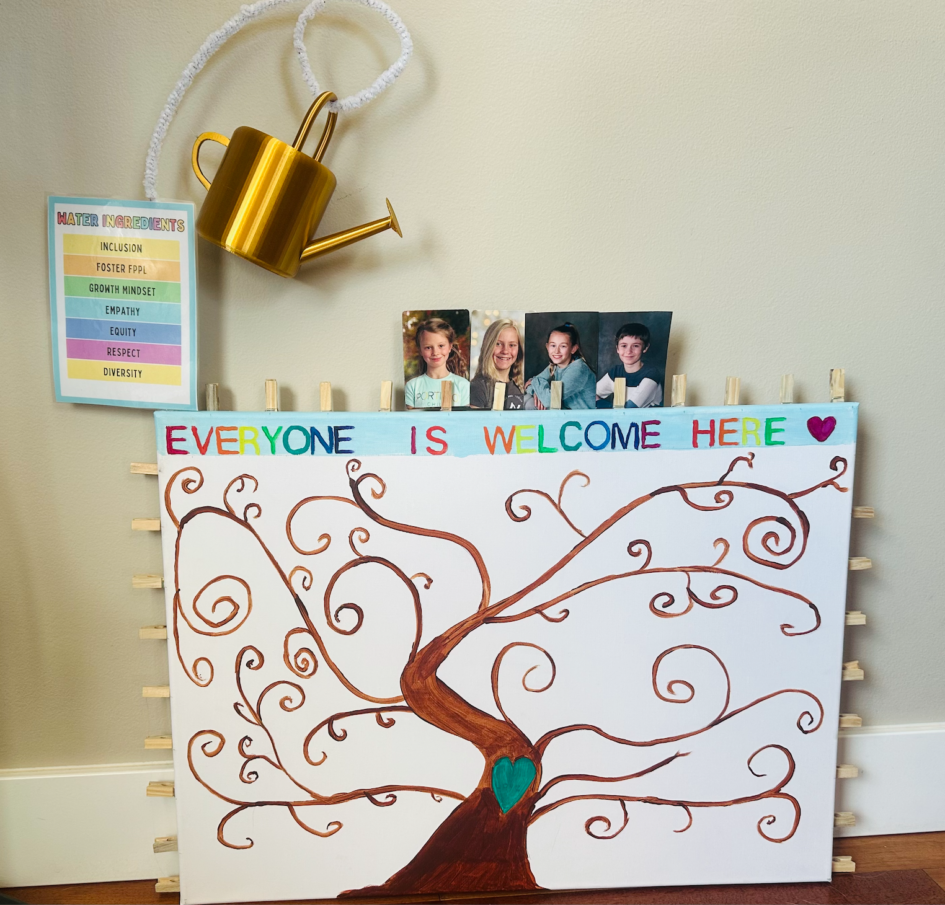
- Classroom Family Tree: The idea to create a class family tree came from doing an assignment in another class. This assignment asked us to create our own family tree, at least 4 generations back, and share this with the class. What this experience taught me is that family comes in all shapes and sizes. No matter my student’s backgrounds, I want this artifact to foster a sense of community within my future classroom. No matter my student’s family circumstances, they will always have a family within our classroom.
- Watering Can: The watering can that is pouring “water” was not in my initial design for the project. This came after I took my dog for a walk late at night after doing homework. I walked by a house that had a watering can with solar lights. I thought to myself “What if my classroom tree was watered by or nourished by inclusive practices?”.
Process of Creation
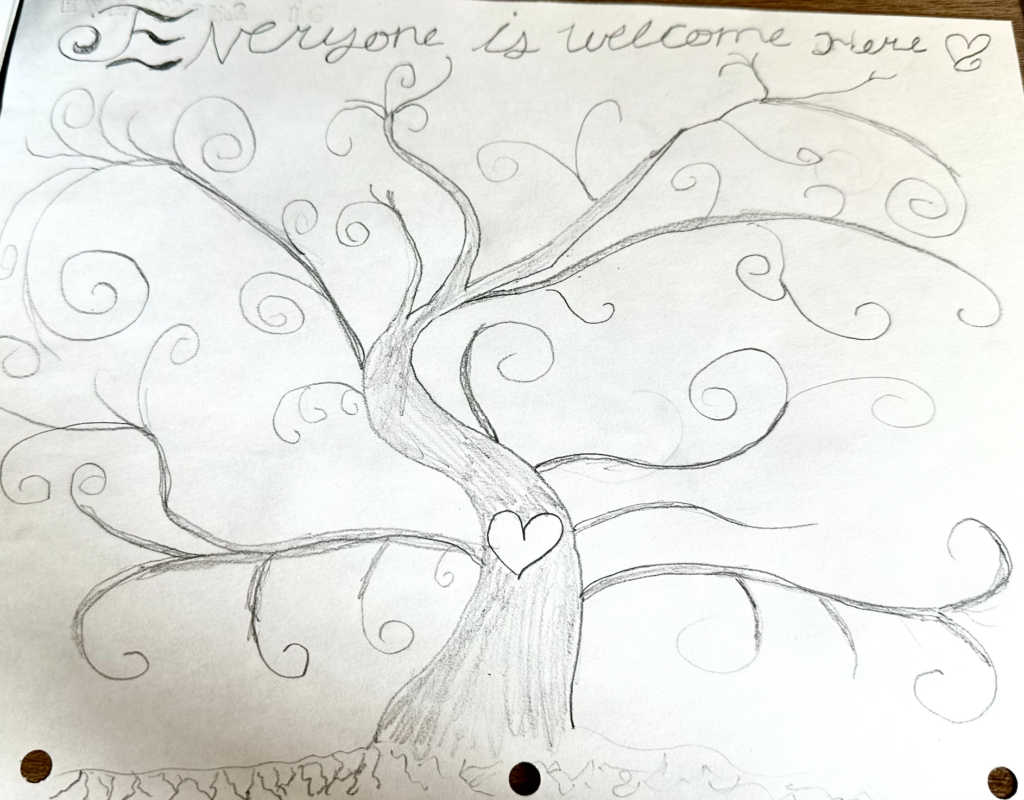
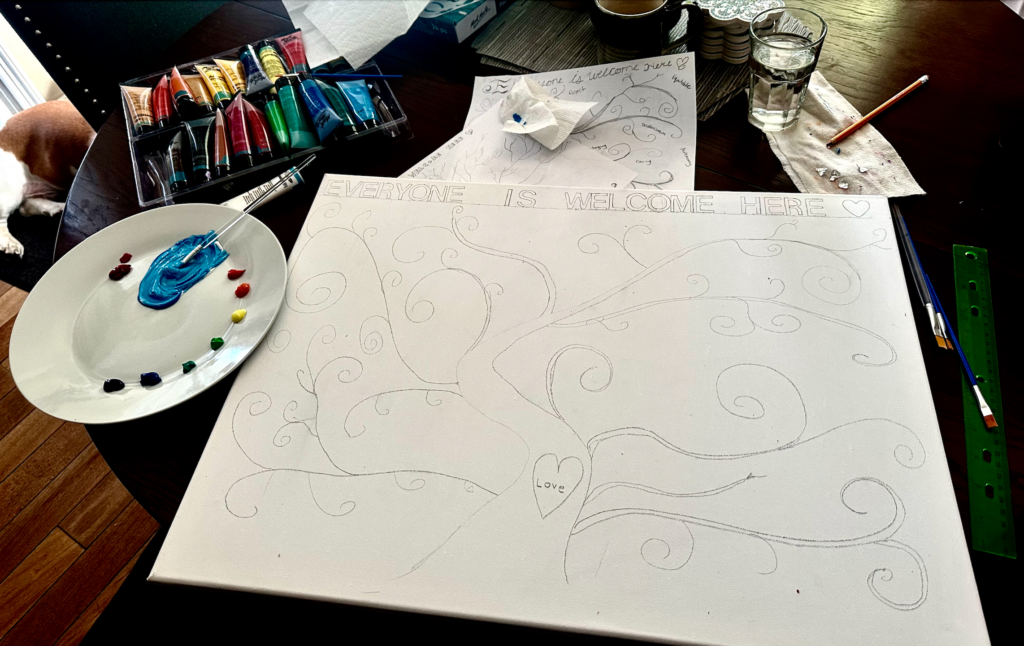
Step #1: Sketching a prototype of my painting:

I did not like how spooky my tree appeared so I chose to draw a different one:
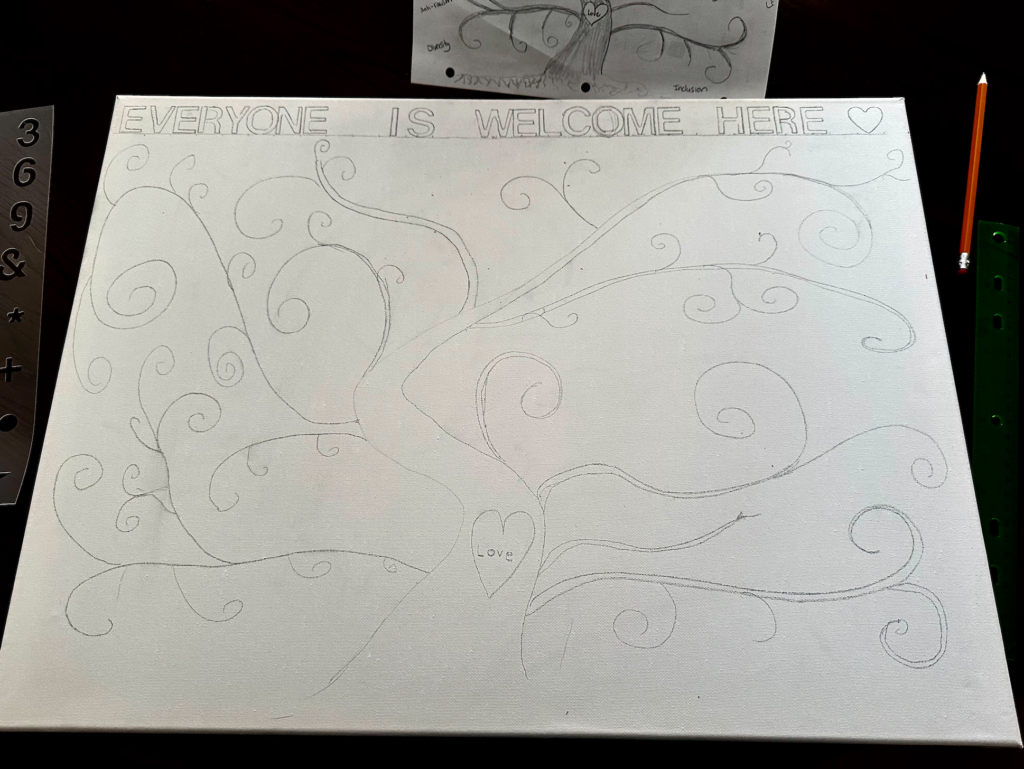
Step #2: Transferring my drawing onto a canvas. As I did this I found it very difficult to make my handwriting look need and nicely spaced. I chose to re-iterate and use a scrapbook letter stencil for the heading “Everyone is Welcome Here”. I calculated the number of letters and spaces then divided that by the space across and knew I had 2cm per letter/space. This made it look a lot neater and clear.

To transfer the drawing onto the canvas I just had my prototype set up above it and drew it out free hand. I am not an artist by any means so this was definitely the most stressful part for me!
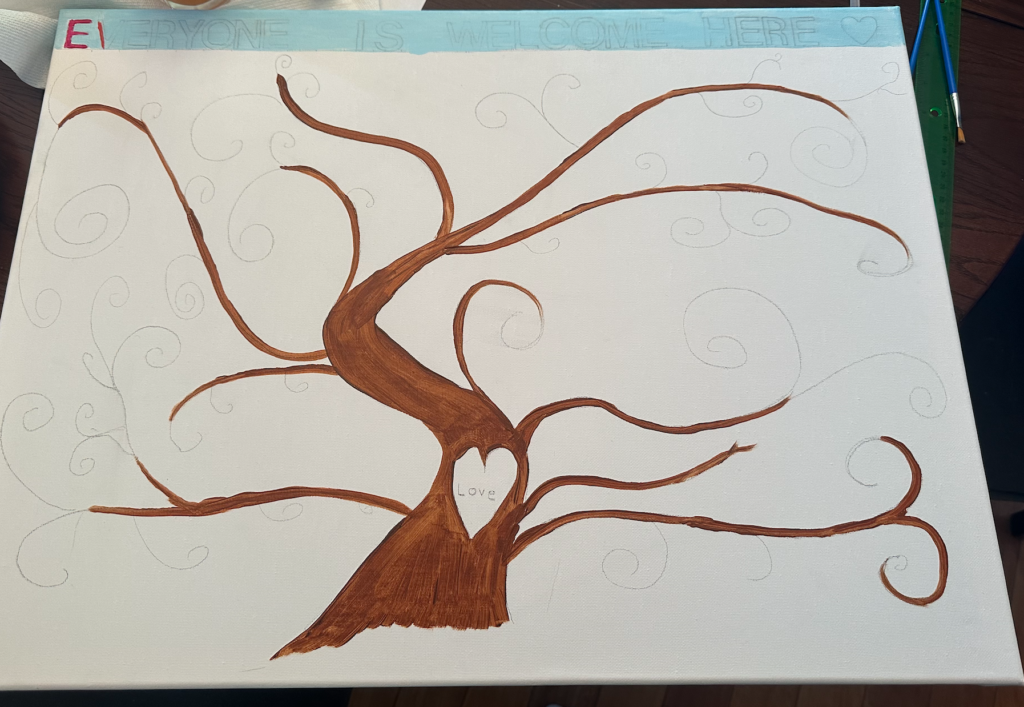
Step #3: Painting
I began painting the title and realized I did not have a small enough paintbrush! I ran to a friend’s house who was so kind to let me borrow one (Thank you, Morgan!). It took me much longer than anticipated to paint the title letters and outline the tree. My steady hand was sure shaking by the end!
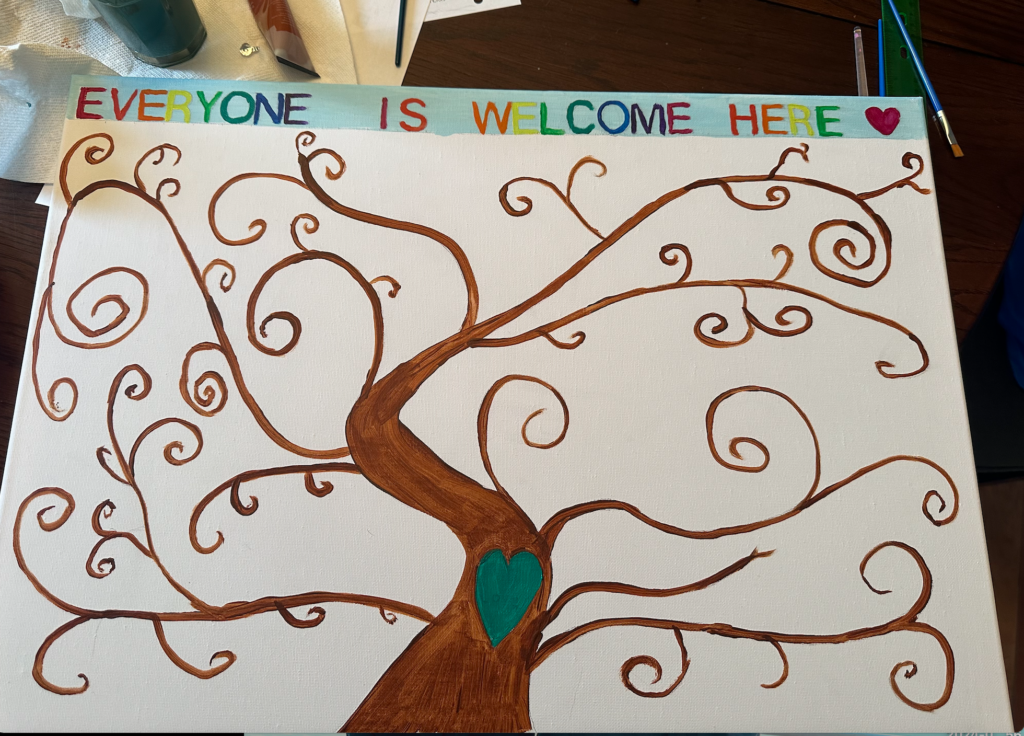
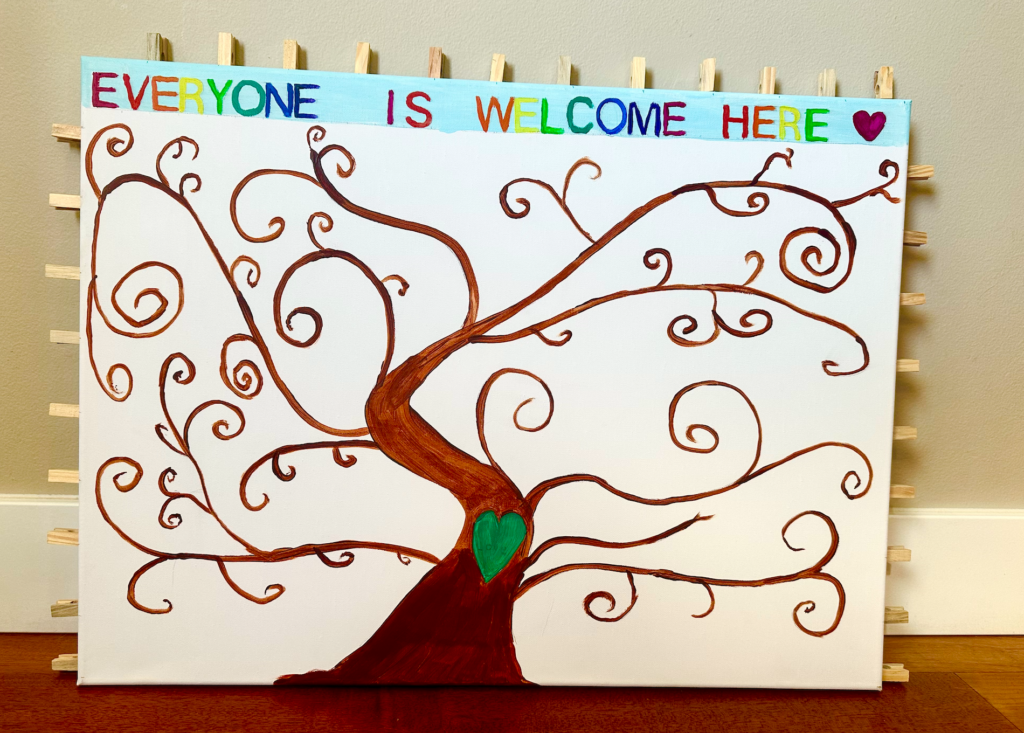
Step #4: Iteration (Add student photos). I looked at it and decided I wanted my students to see more of themselves in the project. This is when I decided to use a hot glue gun to attach clothes pins around the painting so that in a future classroom I can have students hang their picture around the tree. I will always ensure there is room for more students so that if a new student joins our class throughout the school year they feel included.
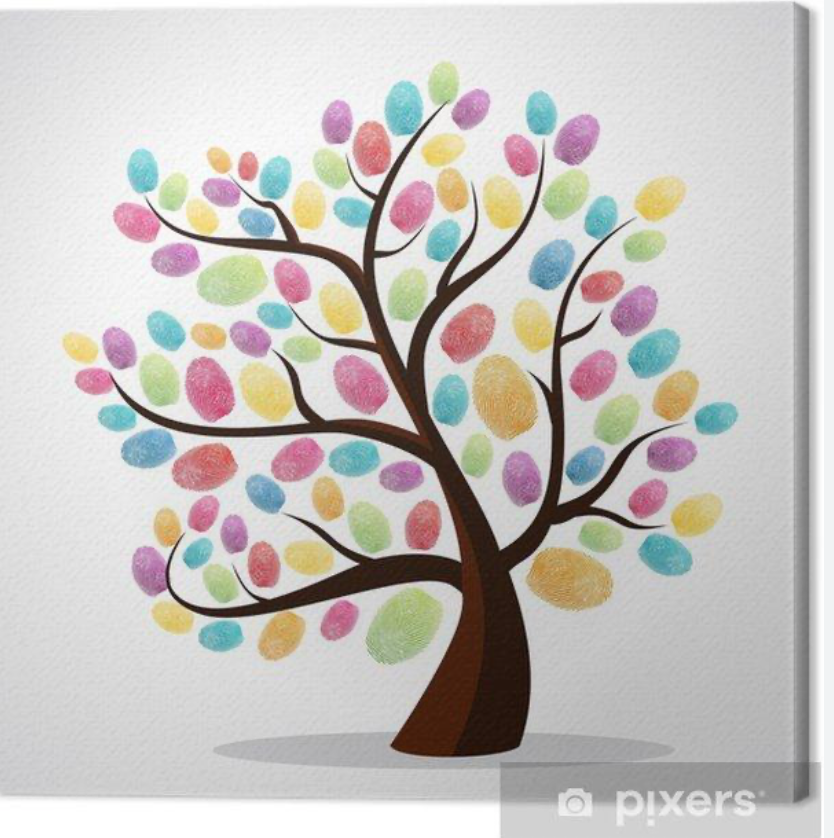
Step #5: Iteration (Student Finger Prints). I looked at my painting and thought how can I make it more bright and inclusive? With this in mind I have decided that every year, each student will place a fingerprint on the tree in their favourite colour. They will then write their initials and year on their thumbprint once it has dried.
Step #6: Iteration (Watering Can). After seeing the solar light watering can lawn ornament on my walk, I decided that even though I could just go buy one or make a mini watering can out of paper, I wanted to challenge my making skills. This is when I reached out to Ryan and asked if I could create a 3-D printed one. I was excited when his response was absolutely yes! Initially I was just hoping to use an already created blueprint of a watering can as I did not have much faith in my own high tech making skills. I am thankful Ryan encouraged me to try making my own with TinkerCad. Below are photos of how I created it:
a) I started making one without any experience. I was super frustrated that I had a vision but could not bring it to fruition without so much struggle. Below is a photo of the design I was trying to make and trust me, it did not look anything like it!
b) Next, I watched a YouTube Tutorial by HLModTech to learn how to use all the features of TinkerCad to make a watering Can. Although the video is only 13 minutes in length, it took me about 2.5 hours to create. I am proud I persevered as I am so much happier with my design! Below is the tutorial I followed:
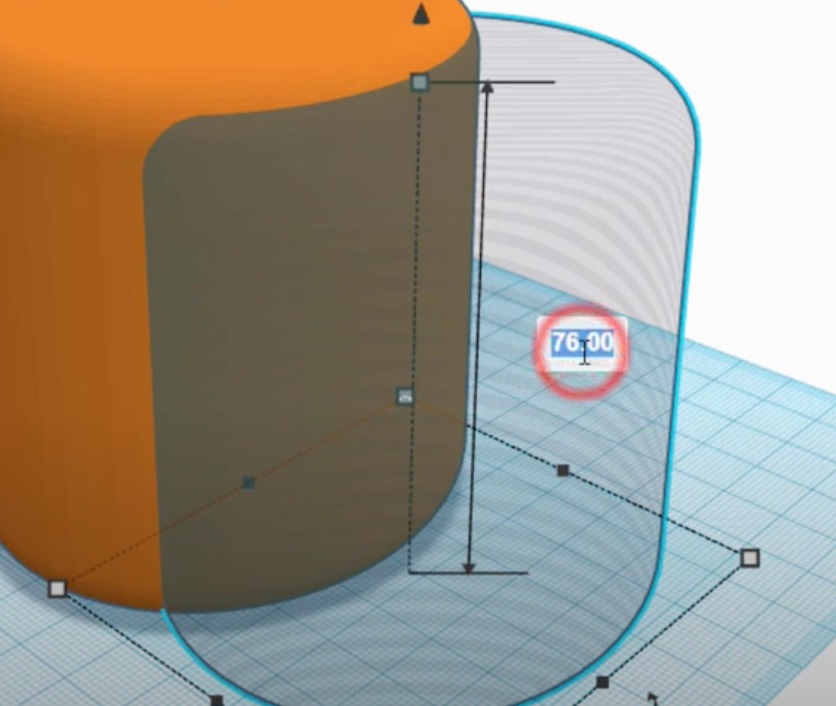
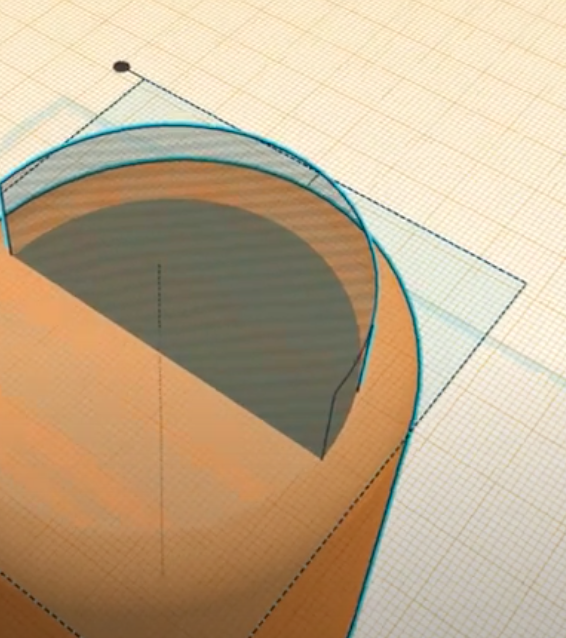
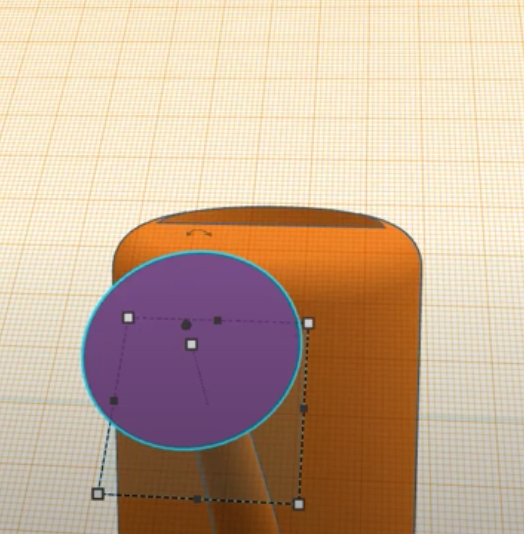
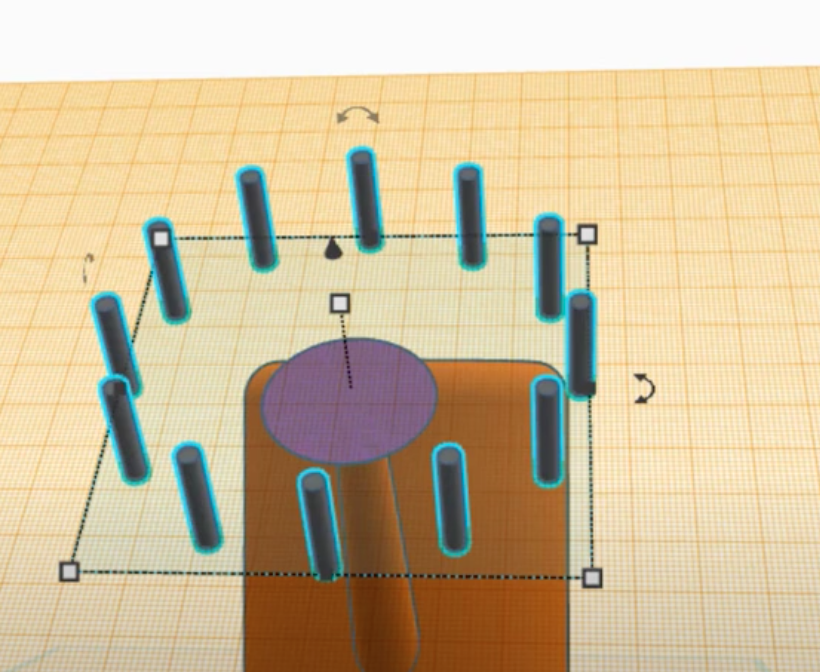
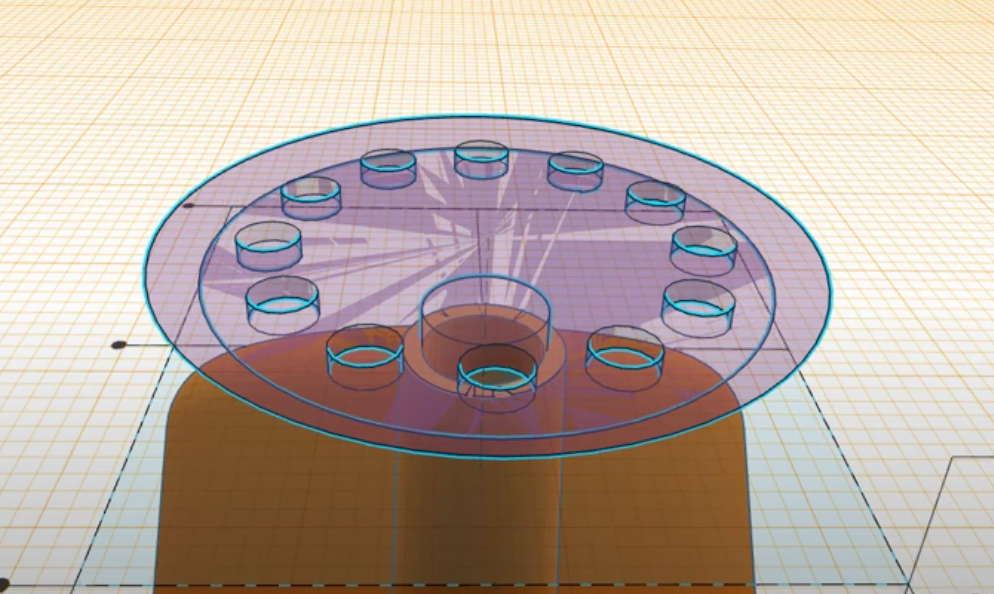
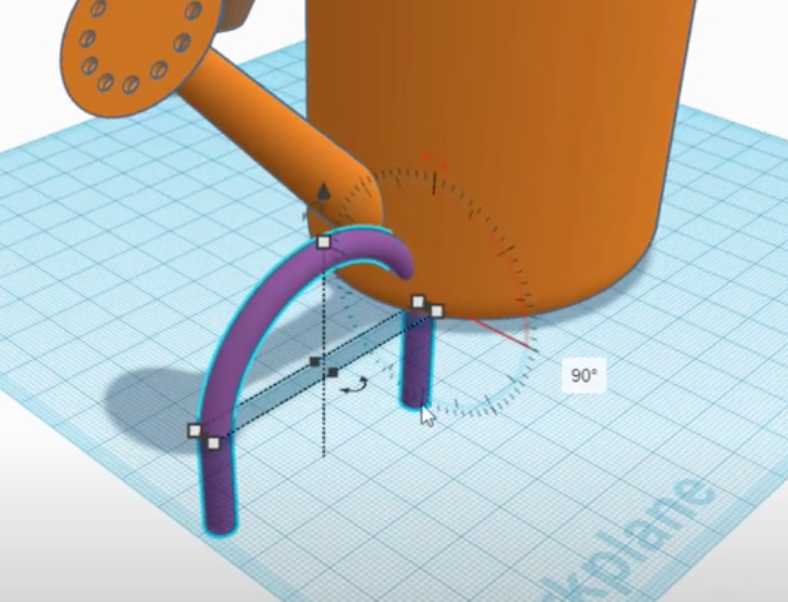
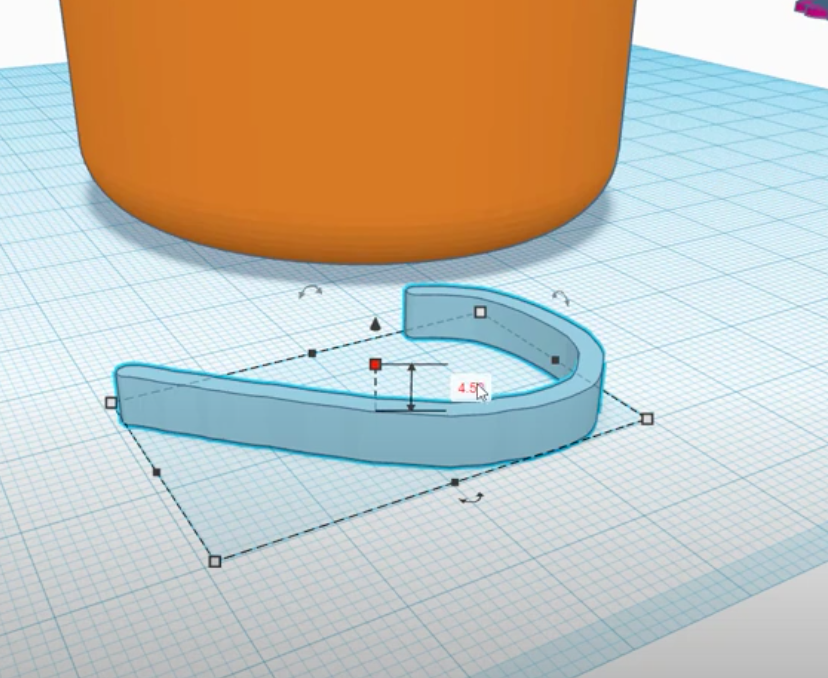
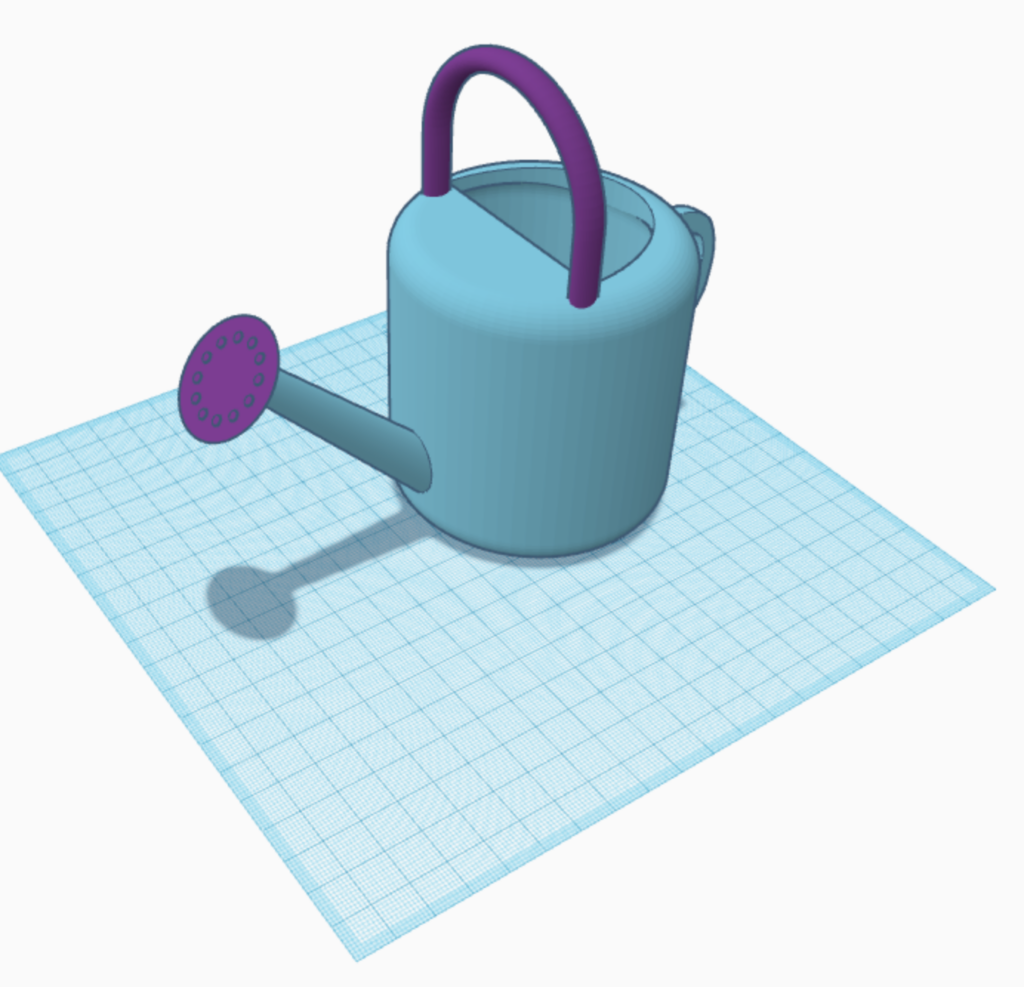
c) Below are a few photos of my design process:
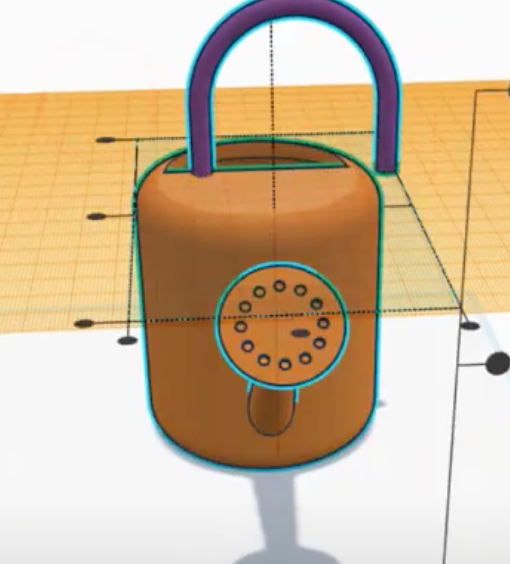
d) Prototype #1:
Unfortunately, my first prototype did not work out so well. The side wall had a hole and the watering spout did not seal. I walked away feeling very defeated. I know this is part of the design process I need to grow to love; however, with multiple deadlines coming up I felt very discouraged. I just kept reminding myself, it doesn’t work YET but I am going to get there!
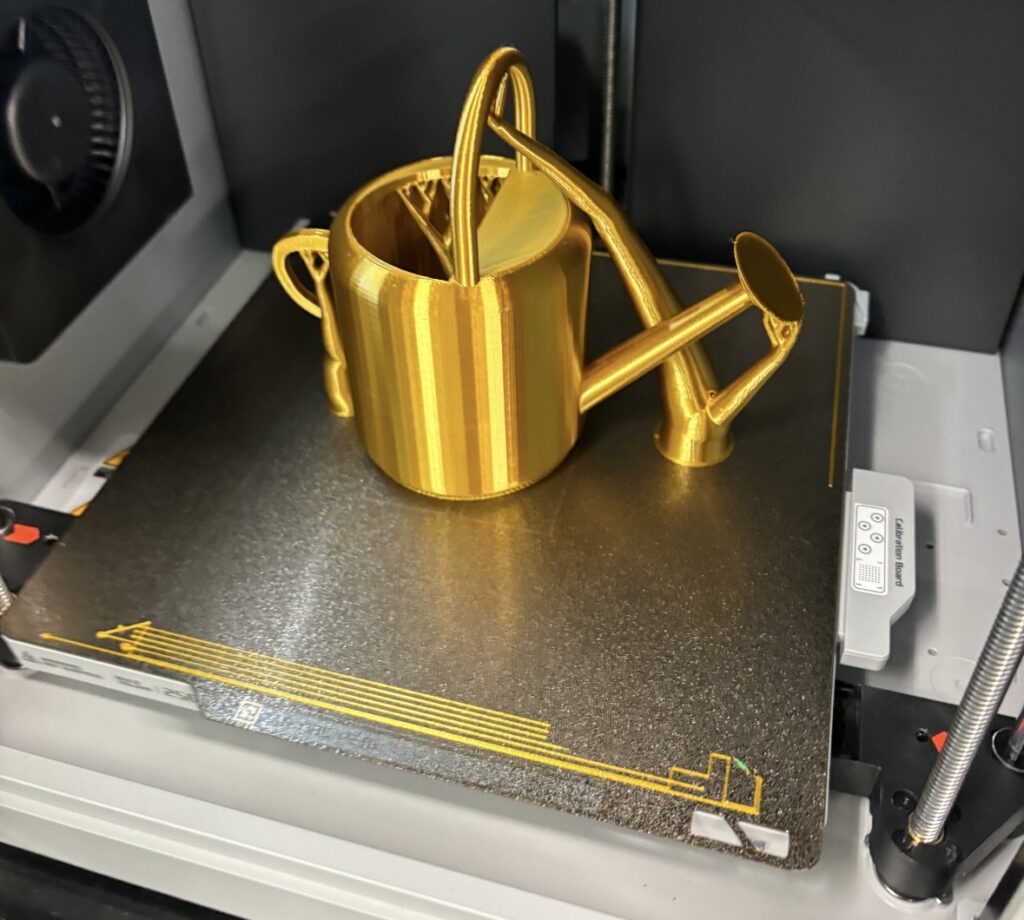
e) Prototype #2:
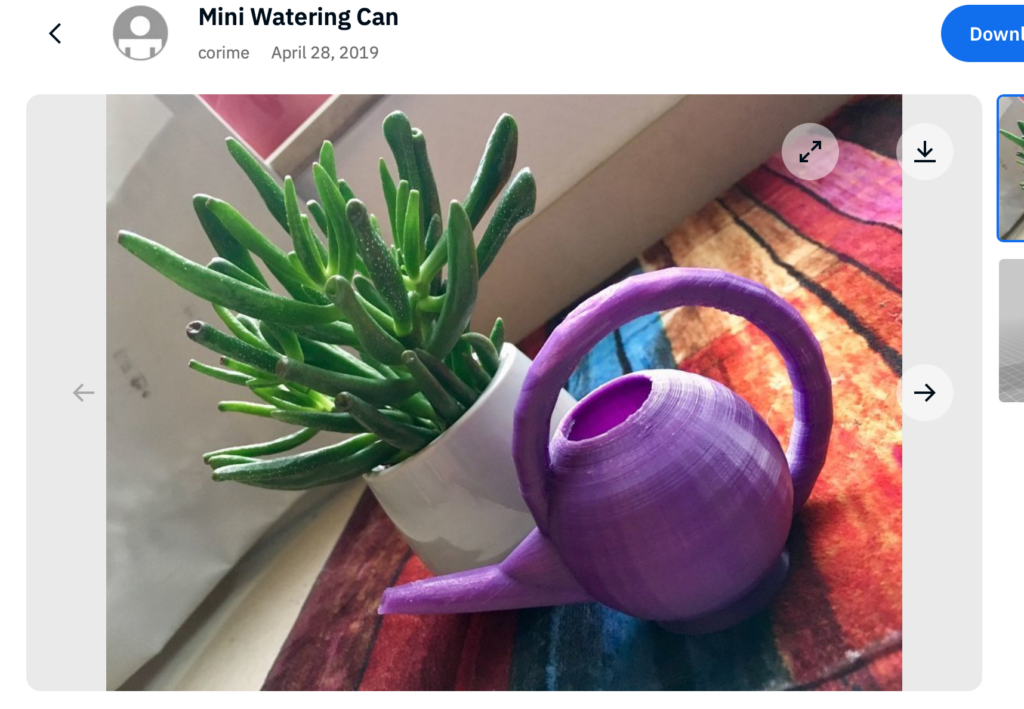
I made some alterations to my design on Tinkercad and tired 3D printing it again at the public library. I am so so thrilled to say it worked! It was also very affordable. This prototype only cost me $2.00.
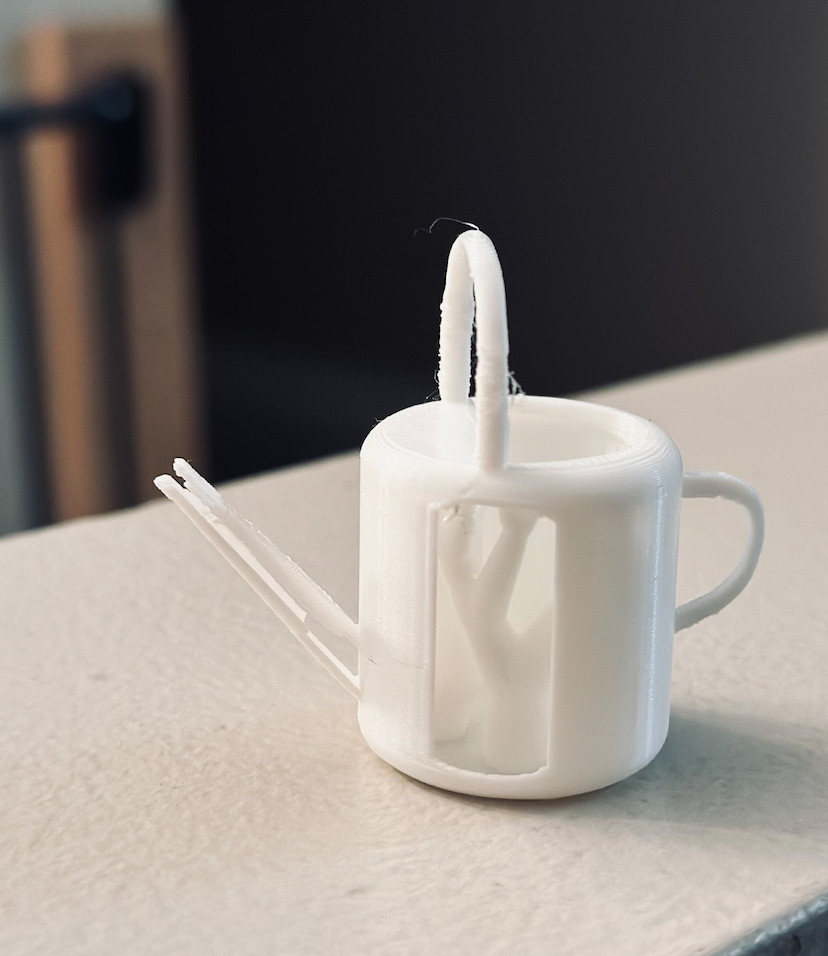
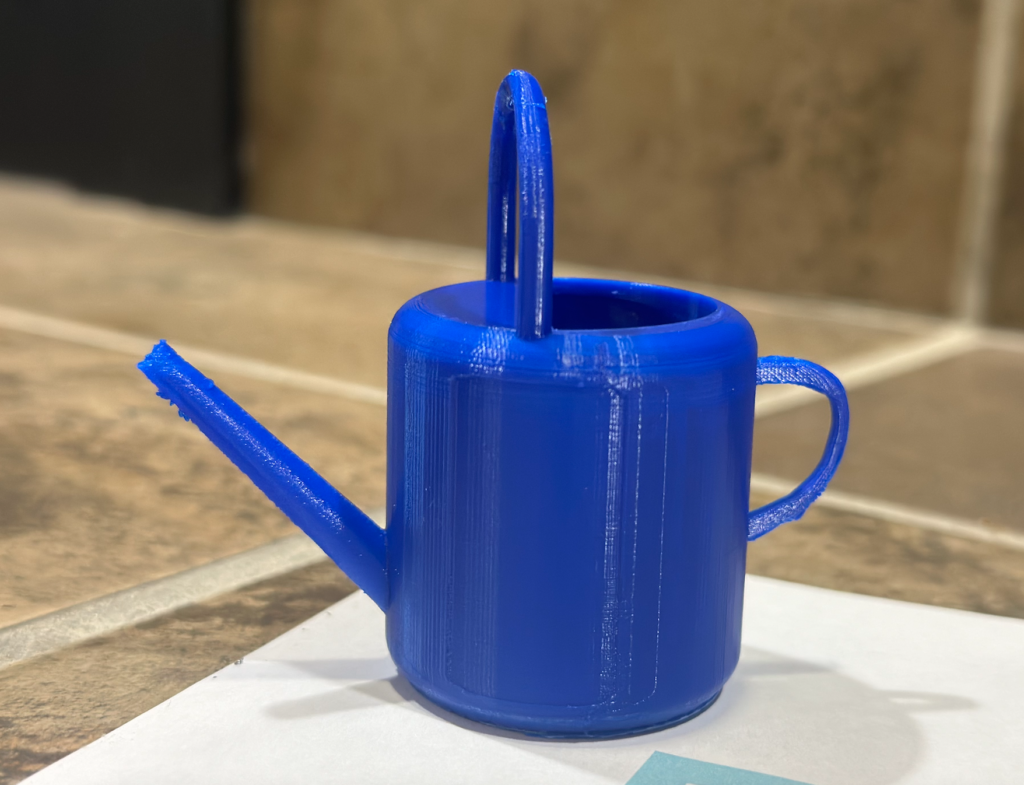
f) Final Product
This is the final print of my 3D watering can. I am very proud to say I created this!
Step #7: EDIDA Connection. I chose to add “water ingredients” by labelling my 3D watering can with words that will make our classroom grow into an inclusive environment and aim to make all students feel welcome and safe. Below is the sign I created with Canva:

My plan is to each month talk to my students about what each word means and how we can foster it as individuals and a classroom community.
Step #8: Putting the final project together.
Iteration #1:
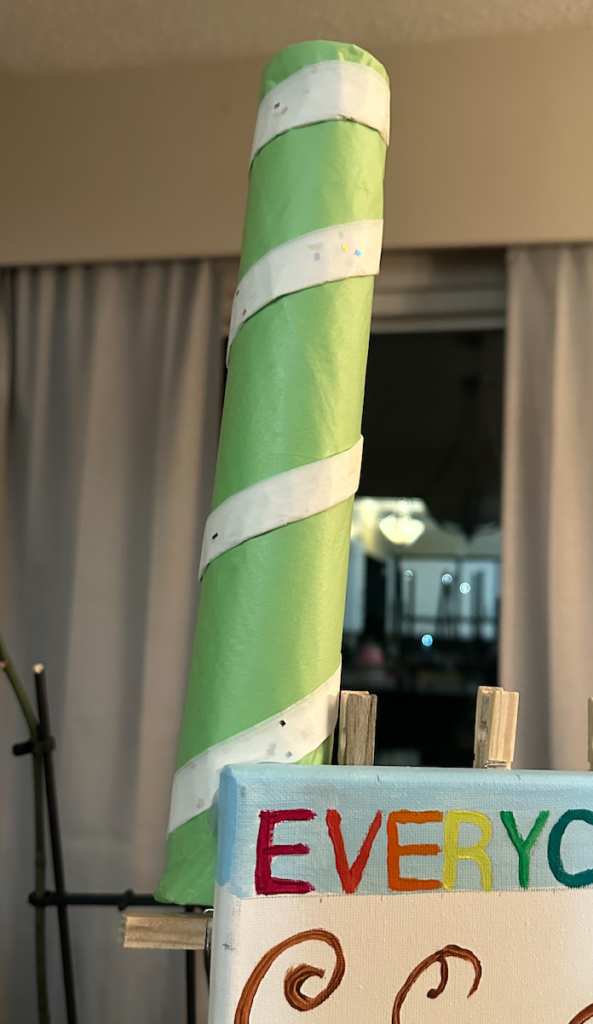
Next, I created a holder for my watering can with a paper towel holder, a hot glue gun, and tissue paper. I really did not like it, I thought it looked tacky! So I created another iteration.
Iteration #2: New hook and added the water ingredients.
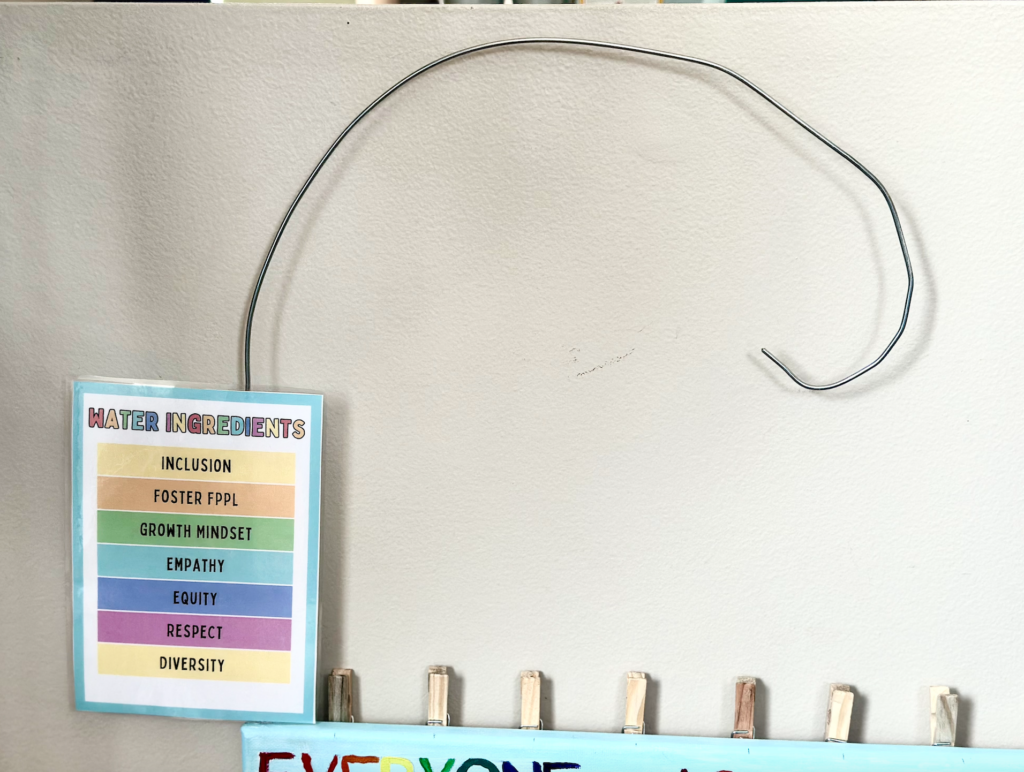
This was my iteration for creating a hook for my watering can. First I cut and modled an old hanger. Next, I drilled a small hole in the top and filled it with hot glue then inserted it inside and waited for it to dry. I then attached my “Water Ingredients” sign.
Iteration #3: Adding the watering can
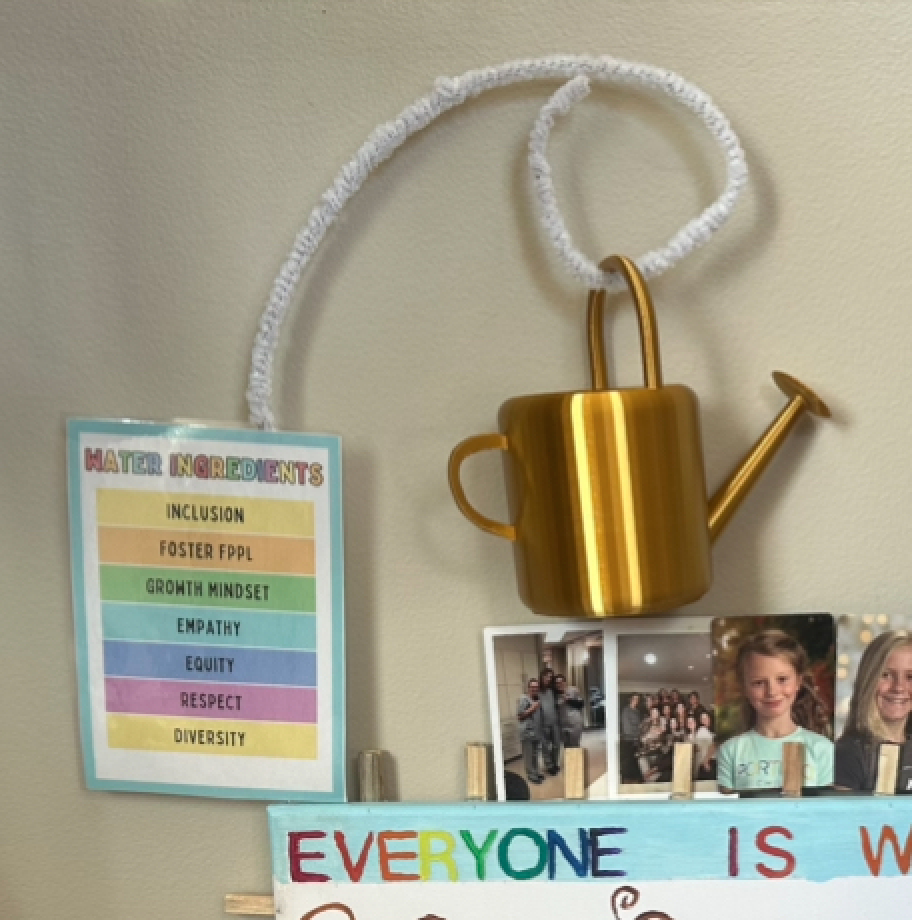
After attaching my watering can to the metal wire, I did not like that it didn’t look like it was pouring onto the tree. Next, in my final iteration I added fishing line to the back handle and attached it to the wire to make it hang on more of an agle.
Final Product:

Location
In my future classroom, I plan to place our classroom family tree right at the front on a bulletin board. The reason I have chosen to do this is so that every single time students walk into the room they always see themselves as part of the classroom community. I am also hoping it will always serve as an important reminder of the importance of inclusion and kindness towards everyone.
How I Will Present it to My Future Students
I am planning to present this to my students on the first day of school in the following way:
Step #1: Read the book “Our Class is a Family” by Shannon Olsen.
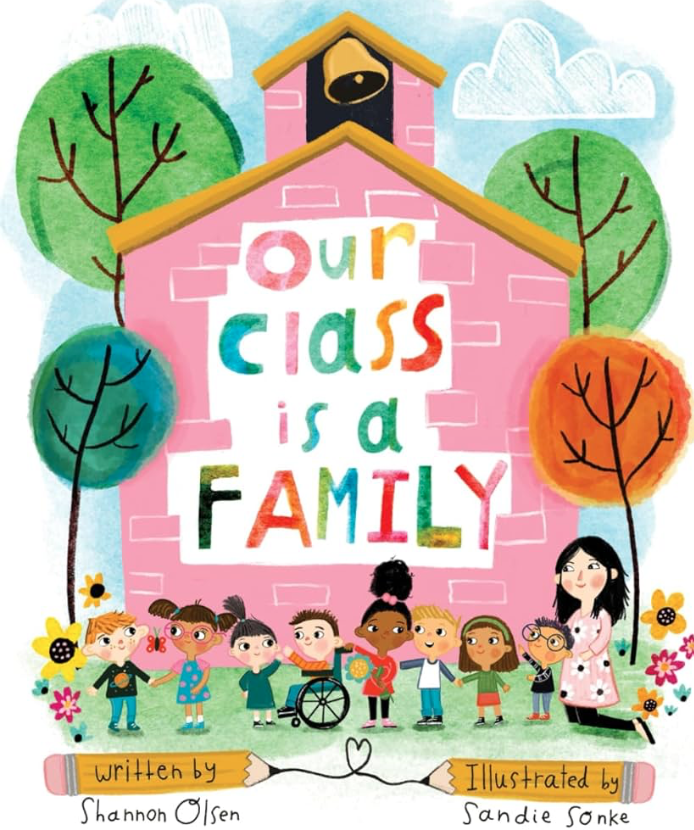
Step #2: Emphasize to students that we are all a classroom family here and it is so important that we are kind, inclusive, and welcoming to everyone.
Step #3: I will introduce our class family tree and have students place a fingerprint anywhere on the tree in their favourite colour. Explain how not one single fingerprint is the same. Everyone is unique and we need to celebrate this diversity in our classroom. Everyone brings their own gift!
Step #4: As students are doing their fingerprints, I will go around and take a photo of each student. After school, I will print off the photos and another day in class I will allow each student to attach their own photo.
Step #5: Have a class discussion on ways we can make everyone in the room feel welcome (Inclusion).
Step #5: The same day students add their photos they will write on their fingerprints. They will include their initials and the year.
Step #6: Each month we will talk about a word on the “water list”. We will talk about what it means and how we can foster this as individuals and a classroom community.
Connection to the Course Readings
Connection #1- “What’s the big idea? Toward a pedagogy of idea power” (Papert, 2000, p. 722):
In this article, Papert (2000), talks about the importance of making learning exciting and hands-on (p. 722). Before reviewing my classroom rules with students, I think introducing this artifact is a great way for students to discover the classroom rules through a hands-on activity. Also, by having the students generate ideas to make the classroom more welcoming, I believe they will take more responsibility to do so.
Connection #2– “Makification: Towards a Framework for Leveraging the Maker Movement in Formal Education (Cohen et al., 2017, p. 222-227):
I learned there are four elements to makification in educational contexts which include “creation, iteration, sharing, and autonomy” (Cohen et al., 2017, p. 22). I connected the article to my artifact creation because it did connect all four elements:
Creation: I started with an idea and used tools such as paint, and a 3D printer, to create my classroom artifact.
Iteration: This one was extremely powerful. The more I worked on this project, the more iterations I decided to make. I started out thinking I knew exactly what the end project was, but letting myself make changes to better it as I went along led to a much more powerful project than I originally imagined and one that I am proud and excited to hang on the wall of my future classroom.
Autonomy: There were no restrictions when it came to this project. At first, this was overwhelming, but in the end I am so thankful for this autonomy as I feel my artifact represents the teacher I want to be and the environment I want my students to have.
Connection #3– “TED-EX Re-Imagine the Future” by Angela Oguntala (2016):
I pulled a quote from this video that resonates deeply with me: “If we imagine the same thing over and over again we limit our possibilities” (Oguntala, 2016). Originally, I kept picturing my project as just a painting. It wasn’t until I spoke with my instructor and peers that I started imagining other ways to make it even better than I first imagined. I now see the critical importance of teaching my students to constantly iterate and not be afraid to push their potential.
Connection #4: The Wheel of Power/Priviledge
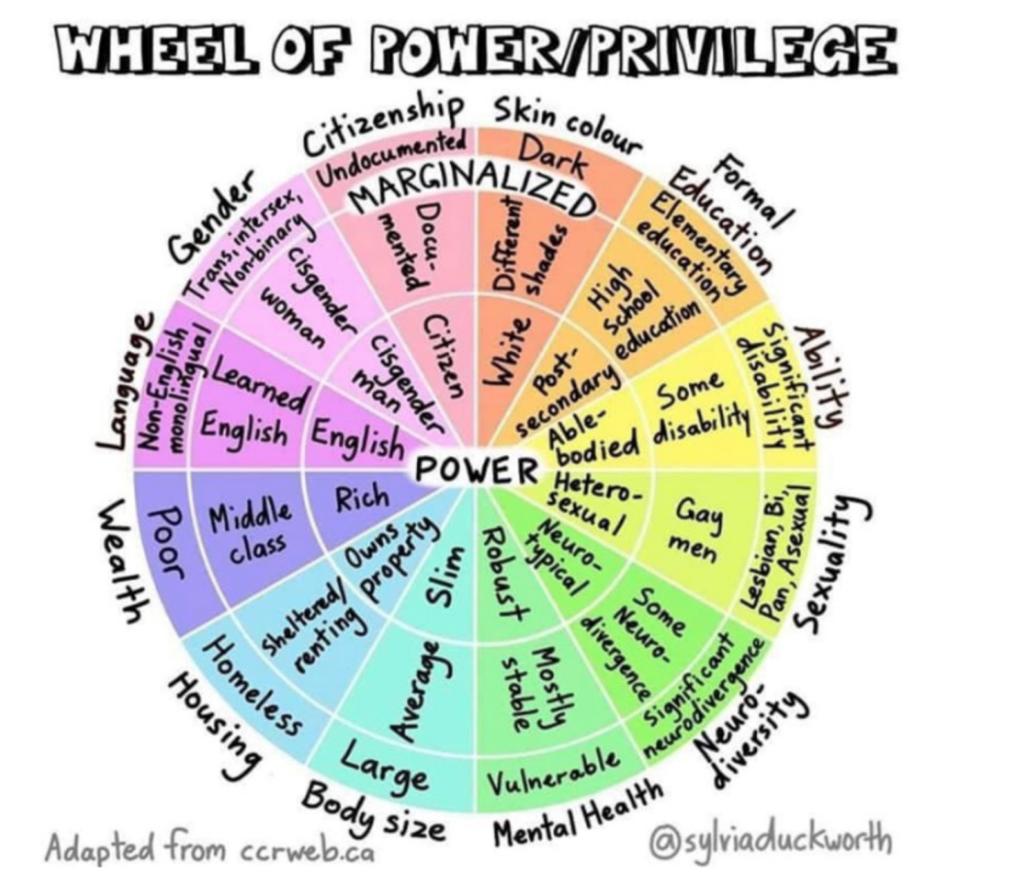
Reading through the Wheel of Power caused me to really think about how my privilege is going to affect my future teaching practice. I must be aware of how the further outwards my students are on the wheel, the more marginalized they are. I have the opportunity as an educator to dismantle the “norms” and build equity for every single student. I know this is much easier said than done, but a few ways I plan to do this are:
-Place my EDIDA artifact up in the classroom and refer to it monthly (at a minimum). These are principles I want myself and my students to live and breathe.
-Each time I interact with a student who may be struggling or interrupting ect.. I will stop, give a respectful response and take time to reflect on how I can best support them before going back to try. Someone once taught me the 5-second response. This is when someone asks you or says something that doesn’t sit well with you, take 5 seconds to really think about how you are going to respond. I realize now, that some of my initial “knee-jerk” responses could be filled with unconscious bias and therefore it is really important to take time to think about what I am saying so I am a more culturally responsive and inclusive teacher.
Connection #5: Journal Article: “Who is Welcome Here? A Culturally Responsive Content Analysis of Makerspace Websites” by Hannah Kye
A few points in this article resonated with me, especially concerning creating my EDIDA artifact.
- “A variety of people with diverse skills and perspectives should be included in the design and possibly implementation process” (Kye, 2020, p. 8). In my initial iterations of this project, I just had students’ photos around the family tree. I thought about it more and decided it would be extremely important to have students be a part of the creation process to take more pride in what it resembles. I plan to involve students by having them place their fingerprints as “leaves” on the tree. They can choose whichever colour they feel represents them and then add their initials into their print once dried. I hope that this creates more buy-in and responsibility for fostering EDIDA principles in our classroom.
- “…[W]ithout conscious effort to teach against the grain, maker educators are likely to perpetuate the cycles of racism and sexism that have plagued STEM fields and contributed to persistent gaps in student outcomes across lines of race, ethnicity, gender, and socioeconomic status. In order to break these cycles, makerspace educators can design spaces and experiences that ensure access to rich science learning for traditionally marginalized students” (Kye, 2020, p. 14). I love this quote because it is a reminder to me to not perpetuate “norms” that can truly affect how students will perceive certain jobs and ultimately their career choices and livelihood. In relation to my EDIDA maker project, I fostered this by showing students that “making” can come in so many forms and is not gender specific. We are all makers no matter our gender, ethnicity, or background. Having this explicit conversation and providing my students opportunities to all be makers will be a crucial step towards fostering multicultural science education (Kye, 2020).
Overall Thoughts
Overall, I am so grateful to this project as it will be a constant reminder on my wall to live and breathe Equity, Diversity, Inclusion, Decolonization, and anti-racism in all that I do. I realize that I will hold “power” in my classroom as a leader and I want to ensure that I am using this “power” responsibly and in a way that brings equity to all students.
References
Cohen, J., Jones, M. W., Smith, S., & Calandra, B. (2017a). Makification: Towards a Framework for Leveraging the Maker Movement in Formal Education. Journal of Educational Multimedia and Hypermedia, 3(26), 217–229.
EDIDA Poster: https://teachingtransformatively.ca/educators/makerspace/part-5-edida-frameworks/
From mind to design in minutes. Tinkercad. (n.d.). https://www.tinkercad.com/
Papert, S. (2000). What’s the big idea? toward a pedagogy of Idea Power. IBM Systems Journal, 39(3.4), 720–729. https://doi.org/10.1147/sj.393.0720
Oguntala, A. (n.d.-a). Re-imagine the future. Angela Oguntala: Re-imagine the future | TED Talk. https://www.ted.com/talks/angela_oguntala_re_imagine_the_future?subtitle=en
Thingiverse.com. (n.d.). Digital designs for physical objects. Thingiverse. https://www.thingiverse.com/
YouTube. (n.d.). YouTube. https://www.youtube.com/watch?v=srVpArXJMOA
Leave a Reply
You must be logged in to post a comment.